
MY HUSBAND, Guy, and I hosted our first Thanksgiving when we were in our twenties and living in Santa Fe. Dinner was a potluck rebellion against all the family Thanksgivings we had ever had—in lieu of turkey, we grilled a mountain of lamb chops, and friends provided much of the rest, laid out on mismatched tables snaking through our Baca Street studio. I clearly remember too many beans, a vegan pumpkin pie, and an abundance of laughter. Dinner went late into the night; dirty dishes were ignored until the next afternoon. It was Friendsgiving before Friendsgiving was a thing.
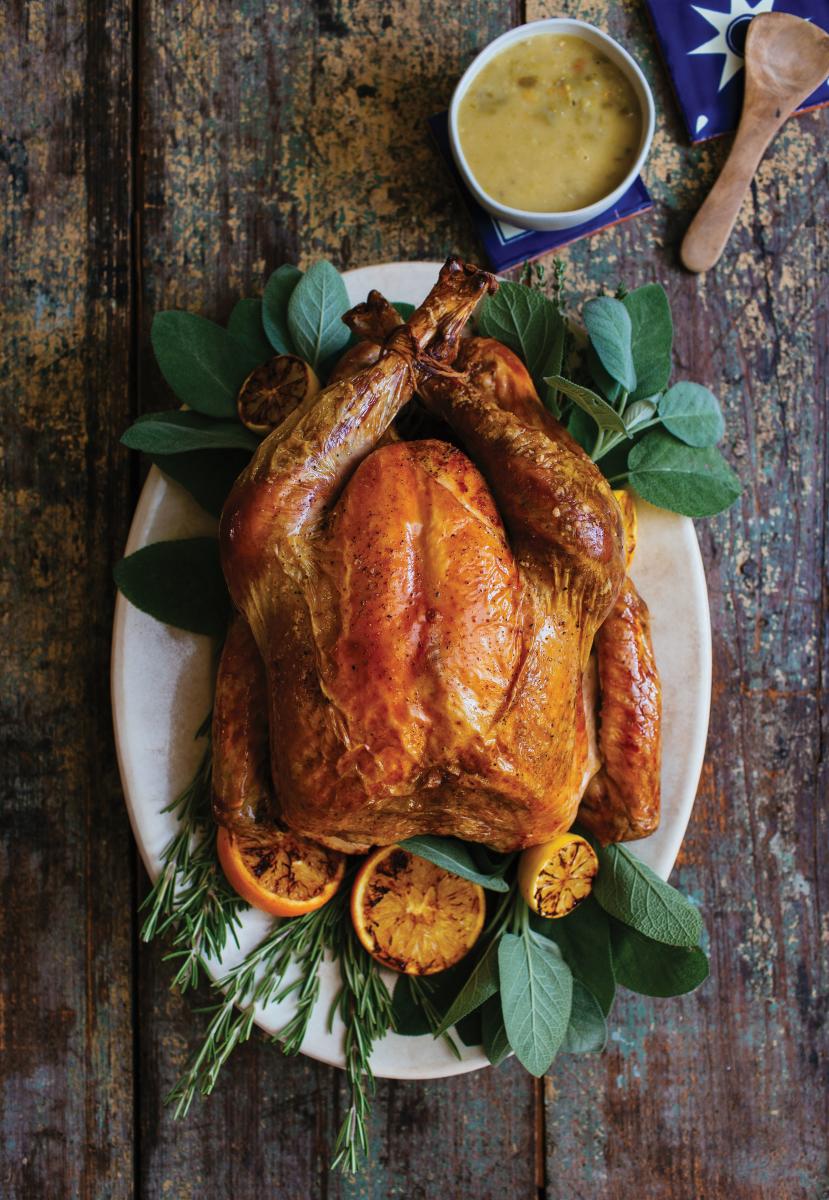
Above: A Simple Roast Turkey with Green Chile Gravy.
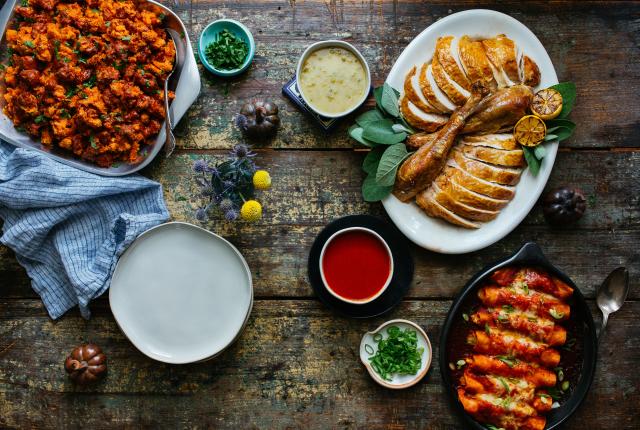
Twenty-some years later, Guy and I now call New Jersey home, but our hearts still beat in New Mexico. While our Thanksgivings have become more traditional over the years—we now grudgingly accept the primacy of the turkey—they still speak to our years in the Southwest. What holiday table, we ask, is complete without plenty of homemade red and green chile? Enchiladas stuffed with butternut squash and goat cheese make the ideal vegetarian side dish, and we have revamped Guy’s family stuffing recipe, swapping in chorizo for the classic Italian sausage. Finally, a bizcochito’s subtle scent of anise has always whispered autumn to us, now even more so since we have transformed the classic cookie into a tart dough filled with caramelized apples. All together, the menu offers a taste of our heart home—embroidered over the years with new experiences and flavors—a place we will always think of with love and gratitude.
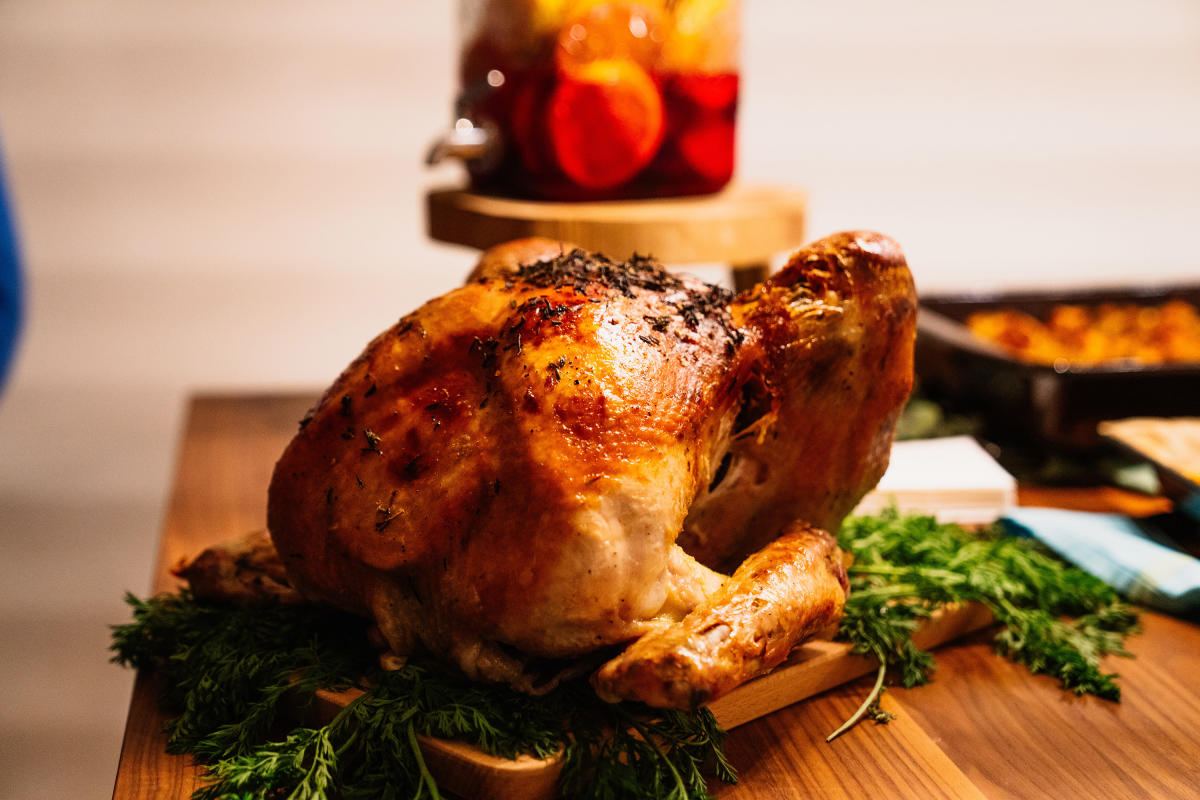 SIMPLEST ROAST TURKEY WITH GREEN CHILE GRAVY
This no-fuss method cooks a turkey fast while producing crisp skin and juicy meat. As the bird rests, you have time to heat up all your side dishes in the oven. We find making gravy at the last minute too stressful to contemplate, so we always prepare it a day or two in advance. But we always save the drippings and the eventual carcass for making turkey stock, which can be turned into gravy for another day or used in weekend posole. You can use this method for a larger turkey, but begin checking its temperature after three hours.
ROAST TURKEY
1 14- to 16-pound turkey
Kosher salt and freshly ground black pepper
GREEN CHILE GRAVY
4 tablespoons olive oil
4 tablespoons unsalted butter
1 large white onion, finely chopped
3 plump garlic cloves, finely chopped
1/2 cup all-purpose flour
2 pounds roasted green chiles, peeled, seeded and chopped
1 teaspoon ground cumin
8 cups good-quality turkey or chicken stock, preferably homemade
Kosher salt
Serves 10–12
ROAST TURKEY
- Preheat the oven to 450°.
- Remove the neck and giblets if present and reserve for another use. (We like to roast the neck alongside the turkey and then use it to make stock later.) Rinse the turkey inside and out and pat dry. Season well all over with salt and pepper. Tuck the wings under the body and tie the drumsticks together with kitchen string.
- Put the turkey on the rack in the roasting pan, breast side up. Add 1 cup water to the bottom of the pan. Roast, uncovered, without basting, adding water to the pan as needed to maintain 1 cup, until a thermometer inserted into the fleshy part of the thigh (do not touch bone) registers 170° on a meat thermometer, 2–2 hours.
- Carefully tilt the turkey so any juices from the cavity run into the roasting pan, then transfer turkey to a cutting board. Let stand, uncovered, for 30 minutes before carving.
GREEN CHILE GRAVY
- Heat the olive oil and butter in a large heavy pot over moderate heat. Add the onions and garlic and cook until very soft, about 15 minutes.
- Add the flour and cook, stirring, for 2 minutes.
- Add the green chile and cumin and stir well to combine.
- Stirring constantly, add the stock in a slow stream.
- Season with 1 teaspoons salt. 2. Bring the mixture to a boil, then reduce heat to low and simmer, stirring occasionally, until slightly thickened, about 15 minutes.
- Taste and adjust the seasonings.
- Serve at once or remove from the heat and cool completely before refrigerating or freezing for future use
 BUTTERNUT SQUASH ENCHILADAS WITH RED CHILE SAUCE
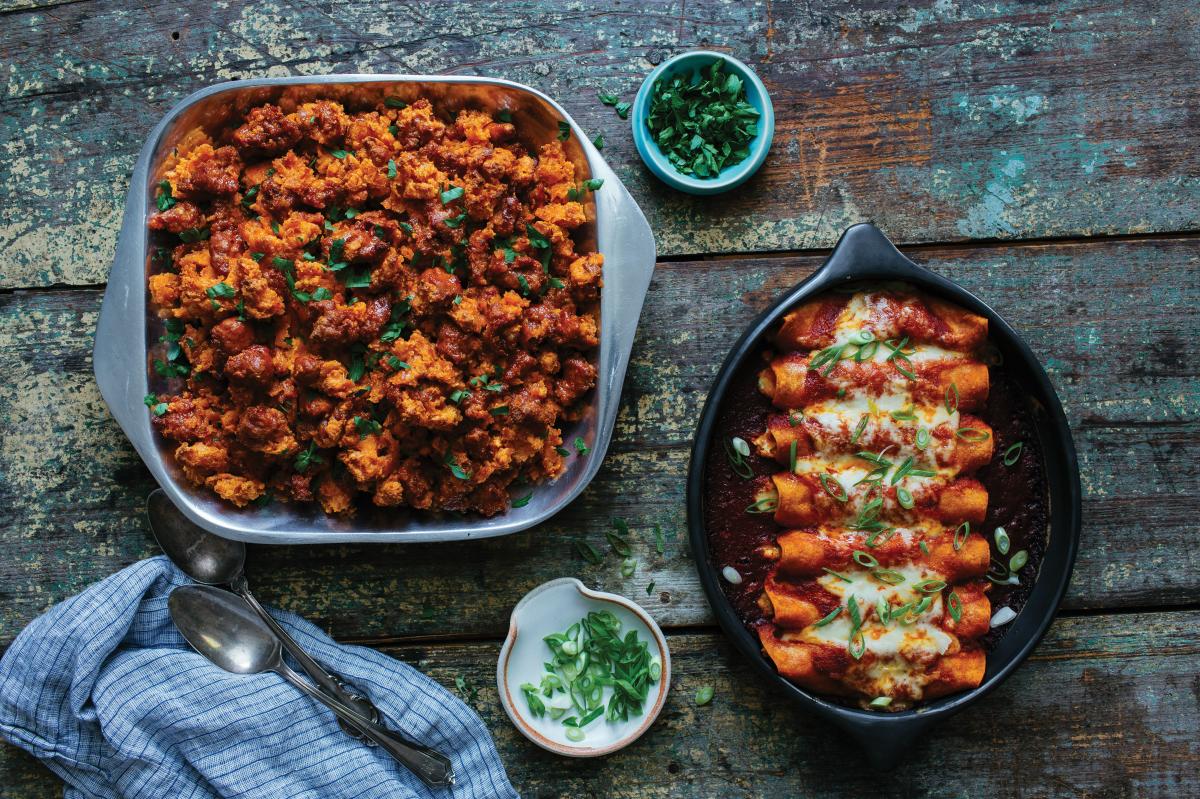
Stuffed with shredded squash, onions, and creamy goat and Jack cheeses, these enchiladas do double duty, providing a holiday main course for vegetarian guests and a satisfying side dish that sidles up to turkey very nicely for everyone else. A food processor makes short work of shredding the winter squash, but you can use spiralized squash from the grocery store to save time if you like.
ENCHILADAS
2 tablespoons olive oil
6 cups shredded butternut squash (from a 2-pound squash)
1 medium white onion, finely chopped
Kosher salt and freshly ground black pepper
1 pound Monterey Jack cheese, shredded
10 ounces goat cheese, crumbled
Vegetable oil, for frying
24 corn tortillas
6 cups red chile sauce (see recipe below), at room temperature
RED CHILE SAUCE
4 tablespoons olive oil
2 white onions, coarsely chopped
6 plump garlic cloves, coarsely chopped
1 tablespoon all-purpose flour
1 1/2 cups New Mexico red chile powder
8 cups water
1 teaspoon dried oregano Kosher salt
Makes 24 enchiladas, serving 10–12
ENCHILADAS
- Heat the olive oil in a large skillet over moderate heat. Add the shredded squash and onion and cook, stirring occasionally, until softened, about 10 minutes. Remove from the heat and season with teaspoon salt and teaspoon pepper. Transfer to a large bowl and let cool, stirring occasionally to speed up the process.
- Set aside 2 cups of the Jack cheese for topping the enchiladas. Stir the remaining Jack cheese and the crumbled goat cheese into the squash mixture. Set aside.
- Heat about inch vegetable oil in a small skillet over moderately high heat. When the oil shimmers, add 1 tortilla at a time, holding under the oil with tongs until just softened, 10 to 15 seconds. Use the tongs to remove the tortilla, letting any excess oil drip back into the skillet before transferring it to a plate. Repeat with the remaining tortillas, stacking them on the plate as you go.
- Once you have fried all the tortillas, heat the oven to 400°.
- Line up the tortillas, red chile sauce, and filling in front of you, as well as a plate on which to roll the enchiladas and two large gratin dishes. Dip 1 fried tortilla into the chile sauce, letting the excess drip back into the bowl. Lay the tortilla on the plate. Spread about 3 tablespoons of the filling down the middle of the tortilla. Roll the tortilla snugly around the filling then place it, seam side down, in one of the gratin dishes. Continue with the remaining tortillas and filling, arranging the enchiladas close together in the dish. (Enchiladas can be made up to this point, wrapped tightly, and refrigerated for up to 1 day.)
- Pour the remaining chile sauce over the enchiladas, leaving the ends bare so they crisp up in the oven. Sprinkle the reserved Jack cheese evenly over the tops.
- Bake, uncovered, until the cheese is bubbling and the edges of the tortillas are crisp, 15–20 minutes. Remove from the oven and serve hot.
RED CHILE SAUCE
- Heat the olive oil in a large heavy pot over moderate heat. Add the onions and garlic and cook, stirring occasionally, until very soft, about 15 minutes.
- Sprinkle the flour over the onion mixture and cook, stirring, for 1 minute. Add the chile powder and stir until a thick paste forms. Add the water, oregano, and 1 teaspoons kosher salt. Bring to a boil, then reduce the heat to moderately low and simmer gently, stirring occasionally, until the sauce has thickened slightly, about 30 minutes.
- Taste and season with salt if needed. Use immediately or remove from the heat and cool completely before refrigerating or freezing.
When we’re feeling ambitious, we’ll make our own chorizo by seasoning freshly ground pork with garlic, red chile, plenty of spices, and a splash of vinegar, but this stuffing is still delicious—very meaty, gently spicy—when you use store-bought. Using a shallow casserole dish means you get the perfect ratio of crisp browned bits on top to soft, juicy bites below.
2 tablespoons olive oil
3 pounds fresh chorizo, casings removed if necessary
6 cups coarse fresh bread crumbs
6 large eggs Kosher salt and freshly ground black pepper
Serves 10–12
- Place a large sheet pan in the oven and preheat the oven to 400°.
- When the oven is hot, remove the sheet pan and drizzle the olive oil over the pan. Crumble the sausage evenly into the pan, return the pan to the oven, and cook the sausage until browned, 15–20 minutes.
- Remove the pan from the oven. Lightly oil a large shallow casserole dish.
- Scrape the sausage and its juices into a large mixing bowl. Add the bread crumbs and toss gently to combine. Lightly beat the eggs with teaspoon salt and teaspoon black pepper. Pour the eggs over the sausage mixture and mix gently to combine. Transfer the mixture to the oiled dish.
- Bake the stuffing, uncovered, until the top is crisp and golden brown, about 30 minutes. Remove from the oven and serve warm.
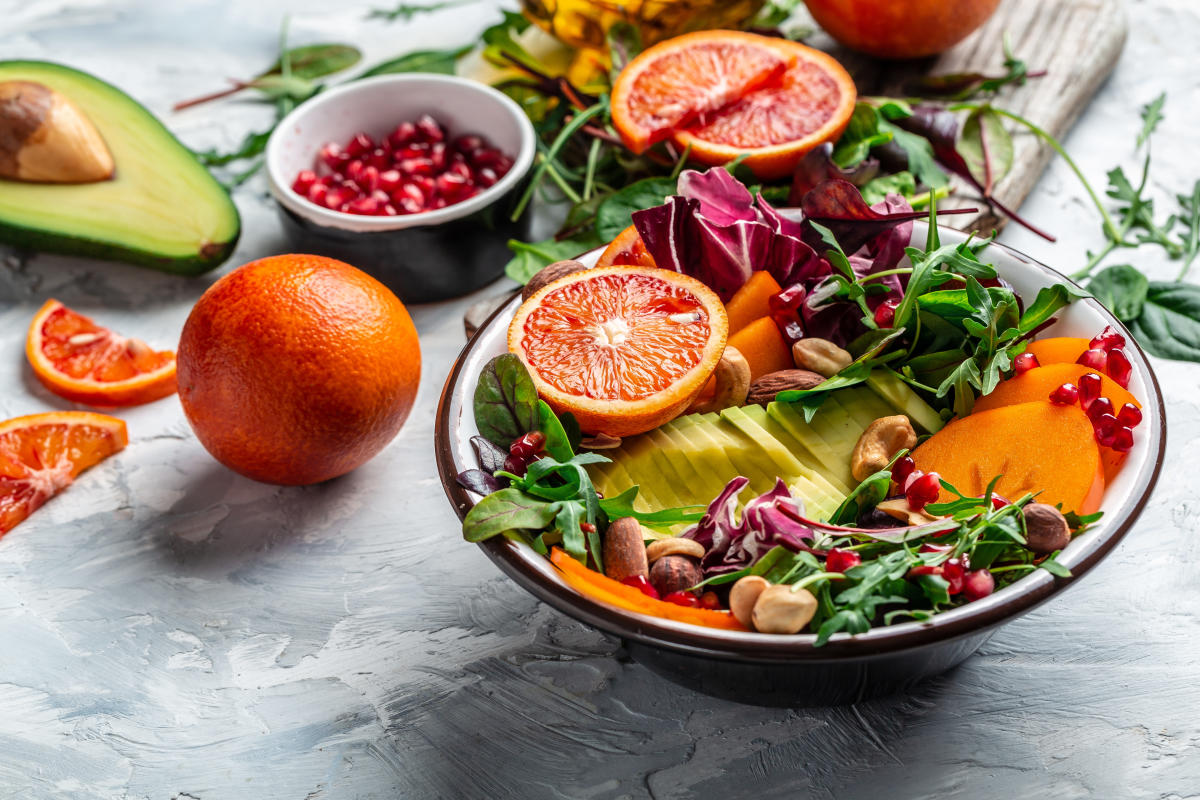 ESCAROLE SALAD WITH FENNEL, ORANGE, AND POMEGRANATE
A rich holiday meal cries out for something fresh and crisp, and we always volunteer to bring a salad when invited to someone else’s house for Thanksgiving. This colorful version is our go-to recipe, in part because it’s refreshing, delicious, and very forgiving—once dressed, the salad holds its crunch and flavors well.
- 1/2 cup extra-virgin olive oil
- 6 tablespoons freshly squeezed lemon juice
- 1/2 teaspoon dried oregano
- Kosher salt and freshly ground black pepper
- 1 head escarole, torn into bite-size pieces
- 2 fennel bulbs, cored and thinly sliced
- 1/2 small red onion, thinly sliced
- 4 oranges, peeled and cut into segments
- 1/2 cup pomegranate seeds
Serves 10–12
- To make the dressing, combine the olive oil, lemon juice, oregano, 1/2 teaspoon salt, and teaspoon black pepper in a jar, seal and shake well to combine.
- Combine the escarole, fennel, and red onion in a large salad bowl. Add the dressing and toss gently to combine. Add the orange segments and toss once or twice to combine. Scatter the pomegranate seeds over the salad just before serving.
 BIZCOCHITO TARTE TATIN
The state cookie makes a mighty fine base for a generous layer of deeply caramelized apples. As you cut the apples, practice placing them in the skillet that you’ll use—that way you’ll cut just the right amount. (Since the apples will shrink a bit as they cook, it’s important to arrange them as tightly as possible.) Once baked, the tarte tatin keeps well for several hours.
For the Dough:
- 1 cup unsalted butter, lard, or shortening (or a combination)
- 1 cup granulated sugar
- 1/2 teaspoon kosher salt
- 1 large egg
- 2 tablespoons brandy
- 1 teaspoon vanilla extract
- 2 teaspoons aniseed, lightly toasted
- 3 cups all-purpose flour
For the Filling:
- 8–10 Golden Delicious apples
- 1 tablespoon fresh lemon juice
- 3/4 cup granulated sugar
- 3/4 teaspoon ground cinnamon
- 4 tablespoons unsalted butter, cut into small piec
Serves 10–12
- To make the dough, combine the butter, sugar, and salt in a mixing bowl and cream together (with an electric mixer or a wooden spoon) until light and fluffy. Beat in the egg, brandy, vanilla, and aniseed until well combined. Add the flour and mix until smooth.
- Gather the dough into a ball, wrap in plastic wrap and refrigerate for at least 1 hour.
- To make the filling, peel, quarter, and core the apples. Place in a large bowl and toss with the lemon juice. Set aside.
- Place the sugar in a 12-inch cast-iron skillet over low heat. When the sugar begins to melt, stir with a wooden spoon until all the sugar is melted and begins to turn pale golden. (Don’t worry if there are a few lumps.)
- Remove the skillet from the heat. Arrange the apple pieces in the skillet, rounded side down, fitting them as close together as possible. Sprinkle the cinnamon and scatter the butter pieces over the apples.
- Preheat the oven to 375°.
- Place the skillet over medium heat and cook until the sugar turns a deep caramel color and the juices released from the apples have reduced a bit, 15–20 minutes. Remove from the heat.
- Lightly flour a work surface and a rolling pin. Roll the dough into a large round, about inch thick. Using a sharp knife, cut the dough into a 13-inch circle. Carefully place the pastry over the apples in the skillet, tucking the dough in around the fruit. Bake until the crust is golden brown, 25–30 minutes. Remove from the oven and let rest 10–15 minutes.
- Run a small sharp knife around the edge of the skillet to loosen the tart. Place a large serving platter over the skillet. Using 2 kitchen towels or potholders, hold the platter and skillet together and invert the tart onto the platter. Don’t worry if any apples stick to the skillet; simply pop them back into place. Let the tart cool slightly before cutting into wedges. Serve with freshly whipped cream.
NOTE: Any leftover pastry can be baked into bizcochitos: Reroll the pastry scraps and, using a 2-inch cookie cutter, cut the pastry into rounds. Arrange on a parchment-lined baking sheet, sprinkle with cinnamon sugar and bake at 375° until edges are golden brown, about 12 minutes.